
Créez, assemblez, sublimez
Notice d’utilisation
Instruction manual — FR · EN · DE · IT · NL · ES · PT · PL
Kit pince à boutons-pression, œillets et boutons plastiques
Snap fastener, eyelet and plastic snap pliers kit
Réf. CS-KBP-300-FL
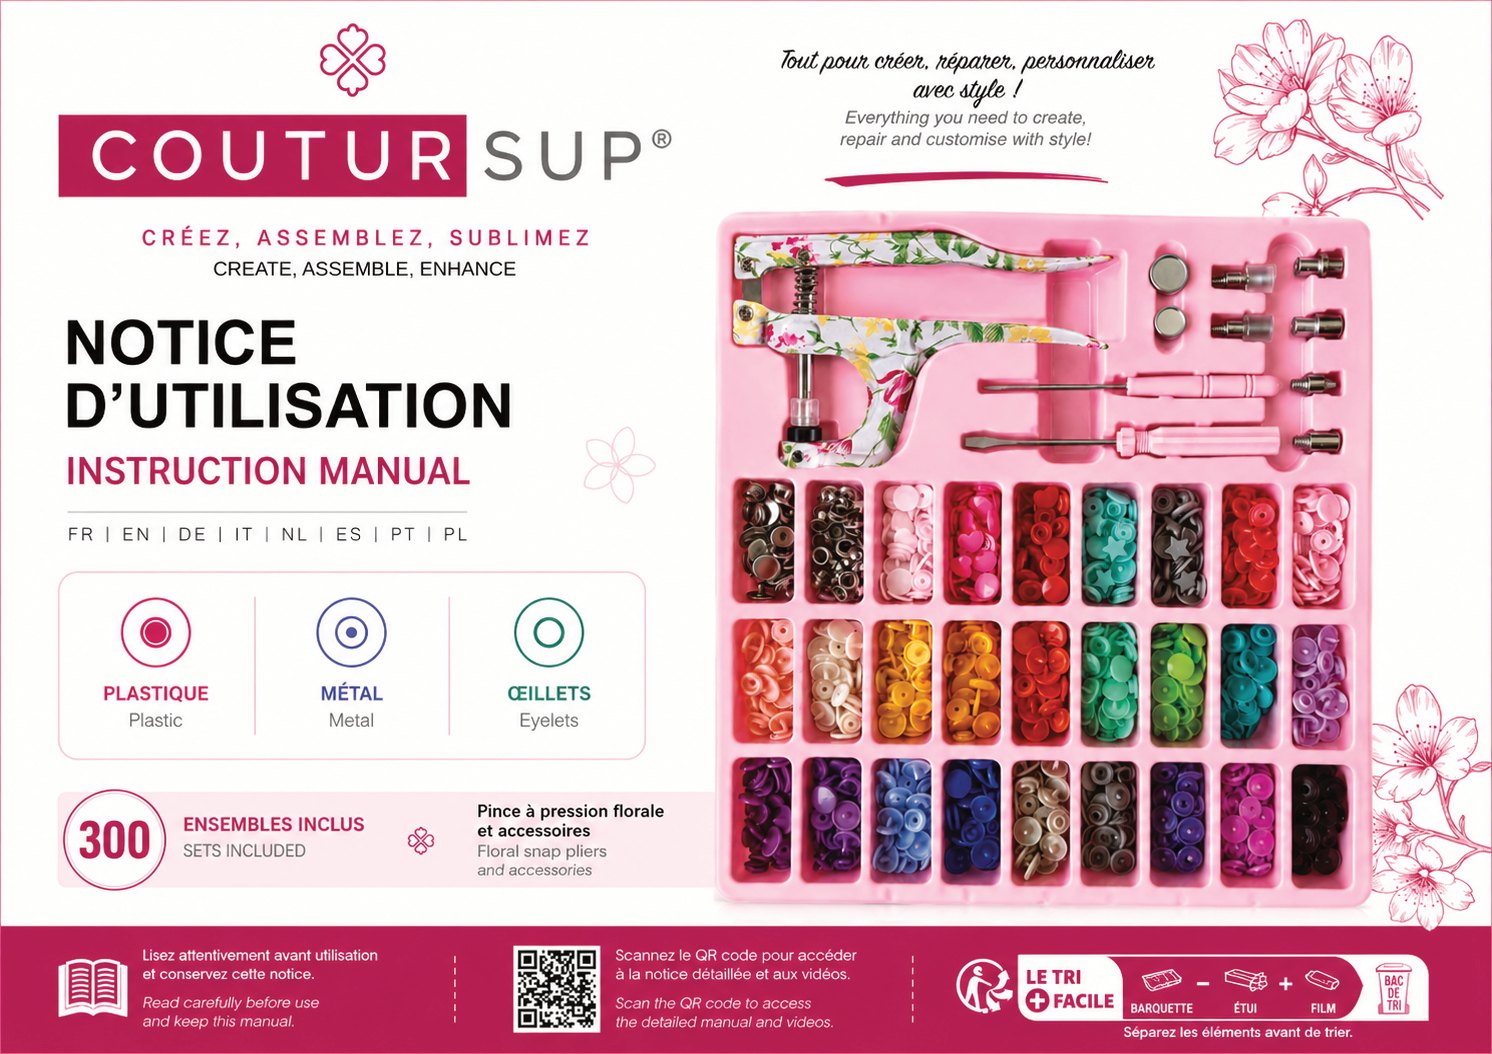
Ensembles inclusSets included — pince à boutons-pression florale et accessoires
Bien démarrer
Getting started · Le kit / The kit
Vérifiez la matrice avant chaque pose. Check the die before each setting.
Le contenu du kit / What’s in the kit
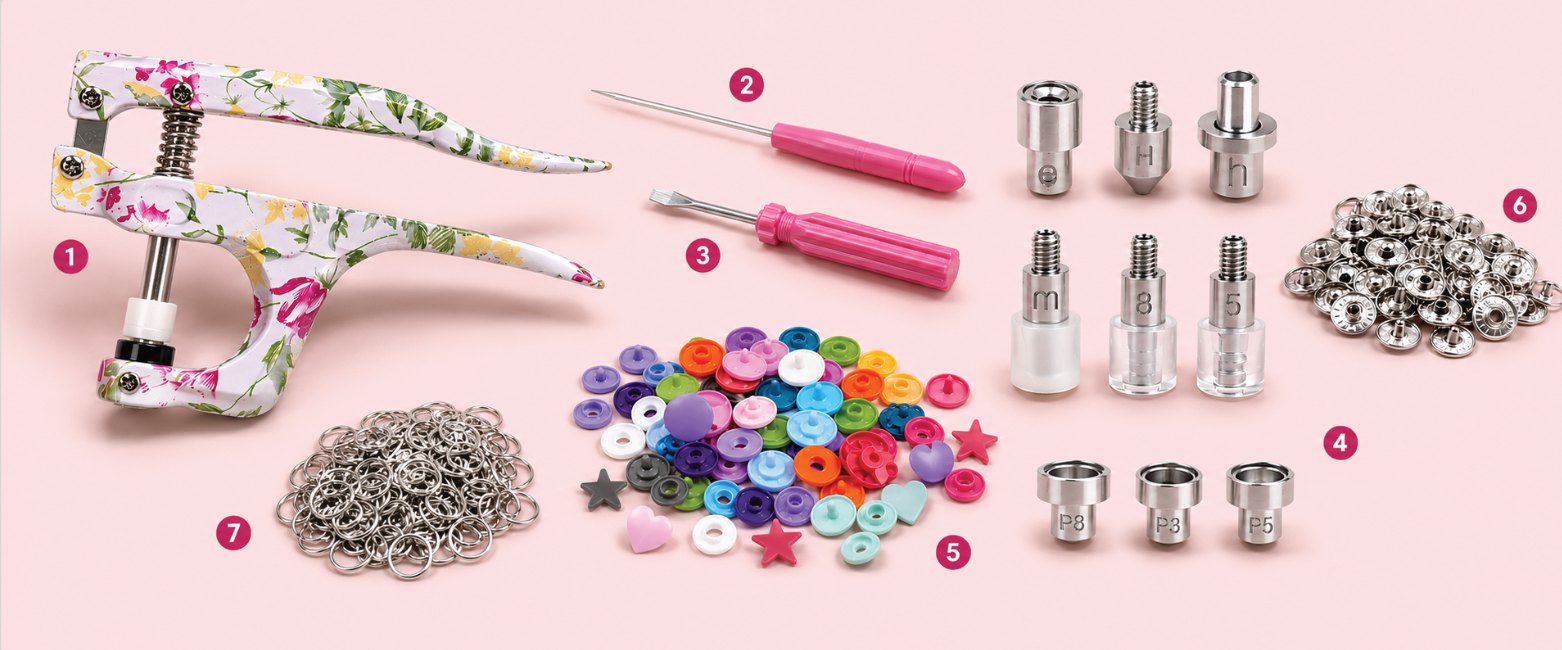
- Pince / Pliers
- Poinçon / Punch
- Tournevis / Screwdriver
- Matrices de pose / Setting dies
- Boutons-pression plastique / Plastic snap fasteners
- Boutons-pression métal / Metal snap fasteners
- Œillets / Eyelets
Changer la matrice de pose / Changing the setting die
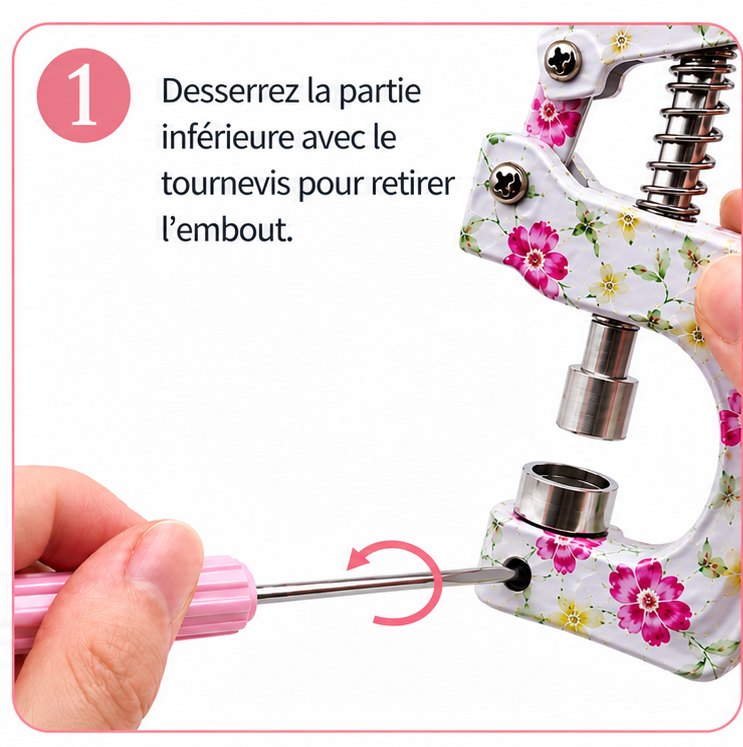
Desserrez le bas au tournevis.
Loosen the base with the screwdriver.
Autres langues
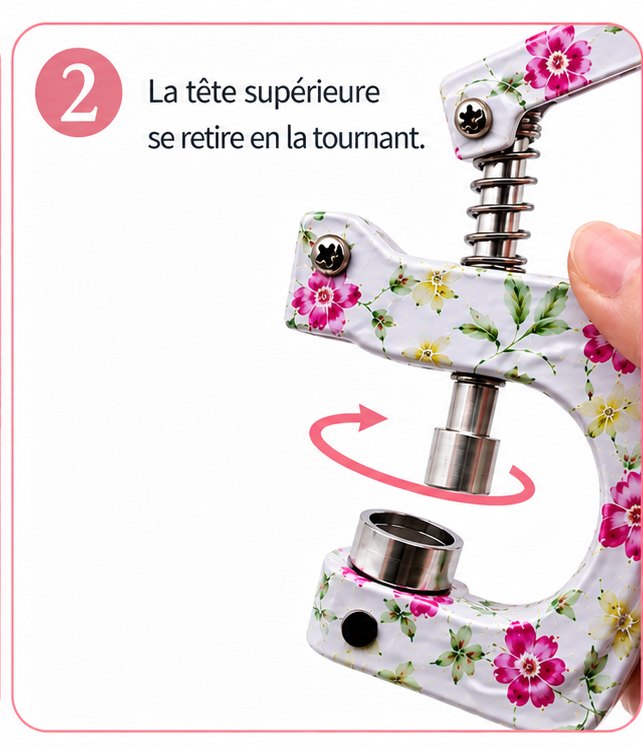
Dévissez la matrice supérieure.
Unscrew the upper die.
Autres langues
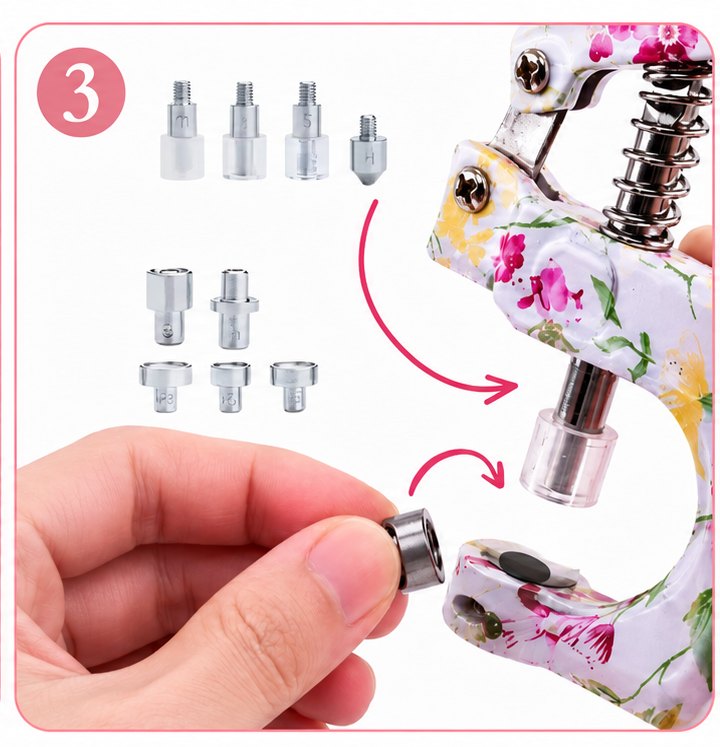
Installez les matrices puis revissez.
Install the new dies, then tighten.
Autres langues
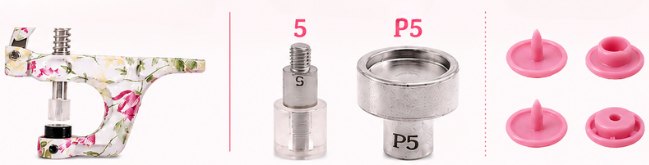
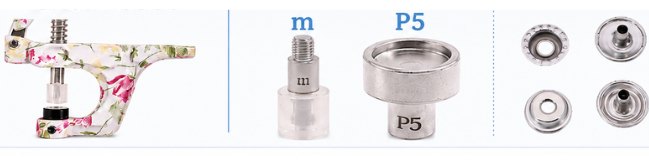
Quelle matrice pour quel usage ? / Which die for which use?
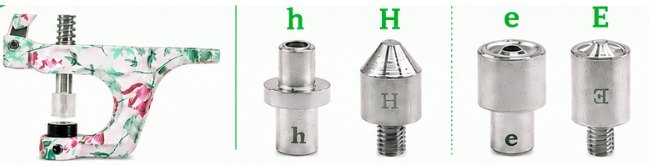
Metal eyelets
Ee
1 · Coupe / Cut : H + h — 2 · Pose / Set : E + e
La pince accepte aussi les boutons plastique T3 (env. 10 mm) avec les matrices 5 + P3, et T8 (env. 14–15 mm) avec 8 + P8. Boutons T3 et T8 non inclus.
The pliers are also compatible with T3 plastic snaps (approx. 10 mm) using dies 5 + P3, and T8 (approx. 14–15 mm) using dies 8 + P8. T3 and T8 plastic snaps are not included.
Boutons-pression en plastique
Plastic snap fasteners · Étapes 1 à 6 / Steps 1–6 · Matrices 5 + P5
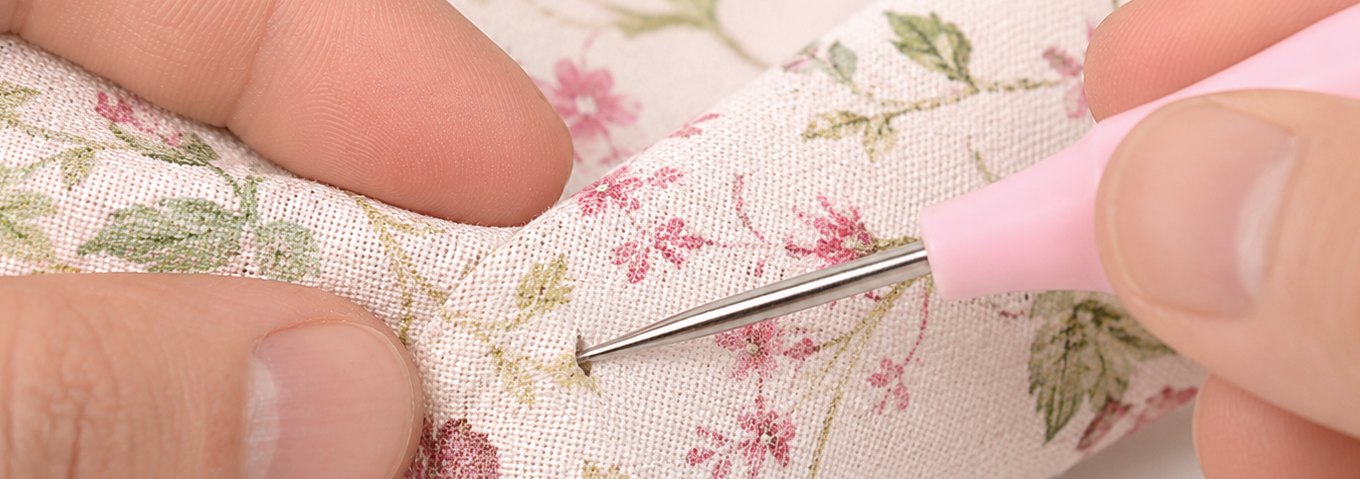
Marquez et percez.
Mark and pierce.
Autres langues
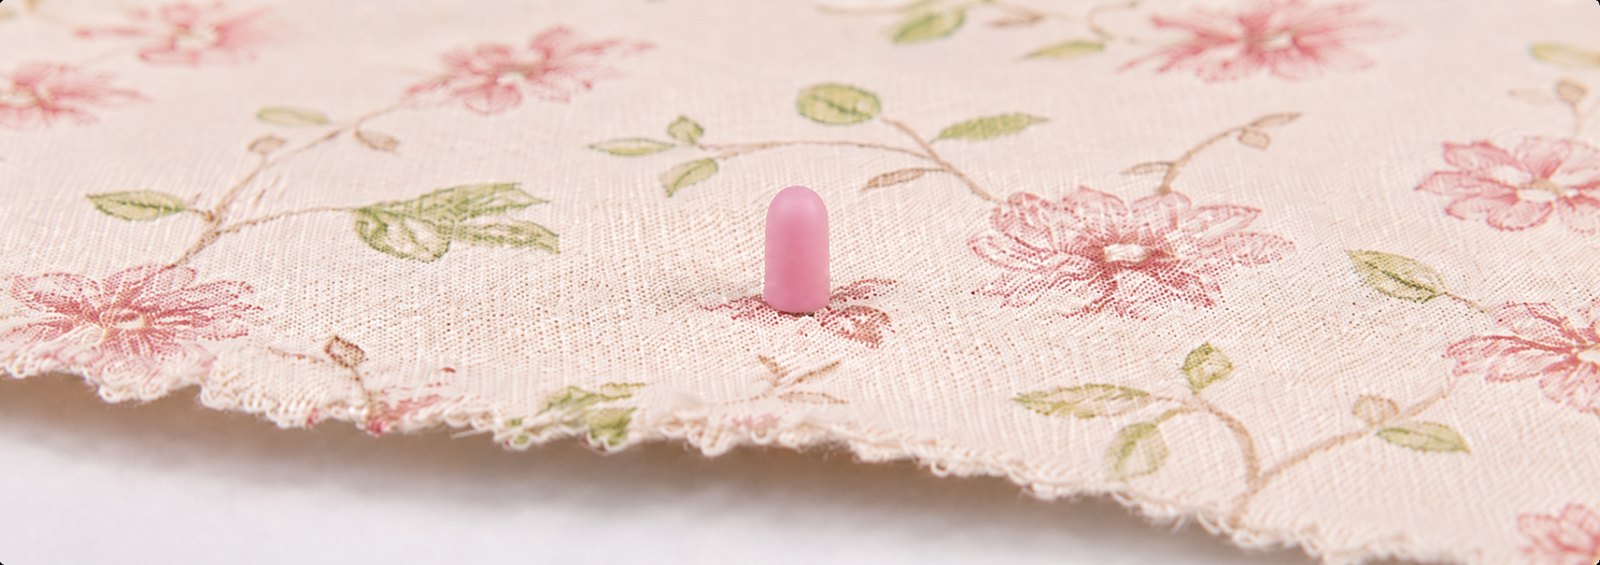
Insérez la tige du capuchon.
Insert the cap post.
Autres langues
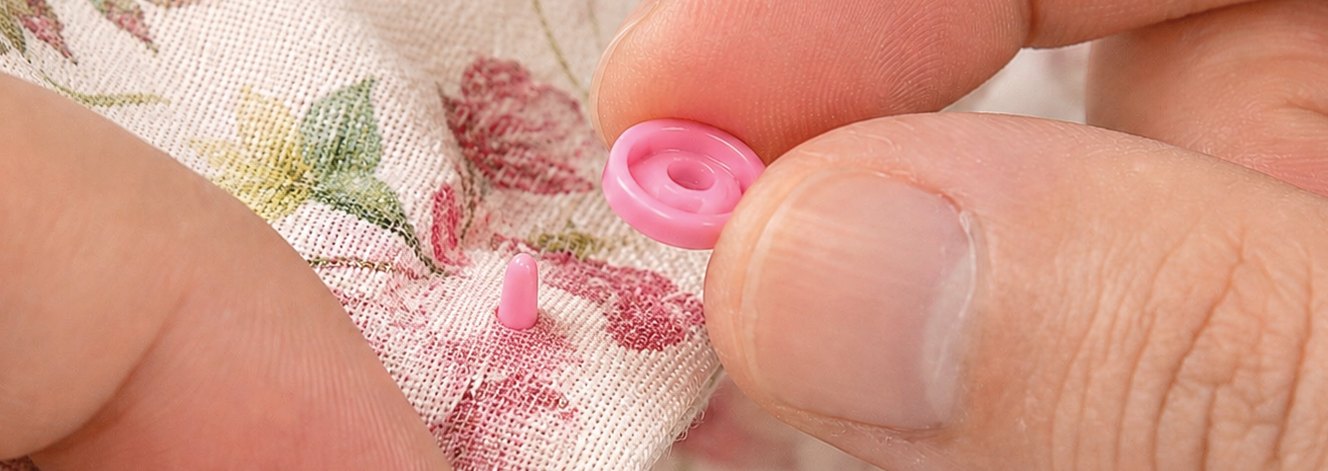
Placez la partie femelle.
Place the female part.
Autres langues
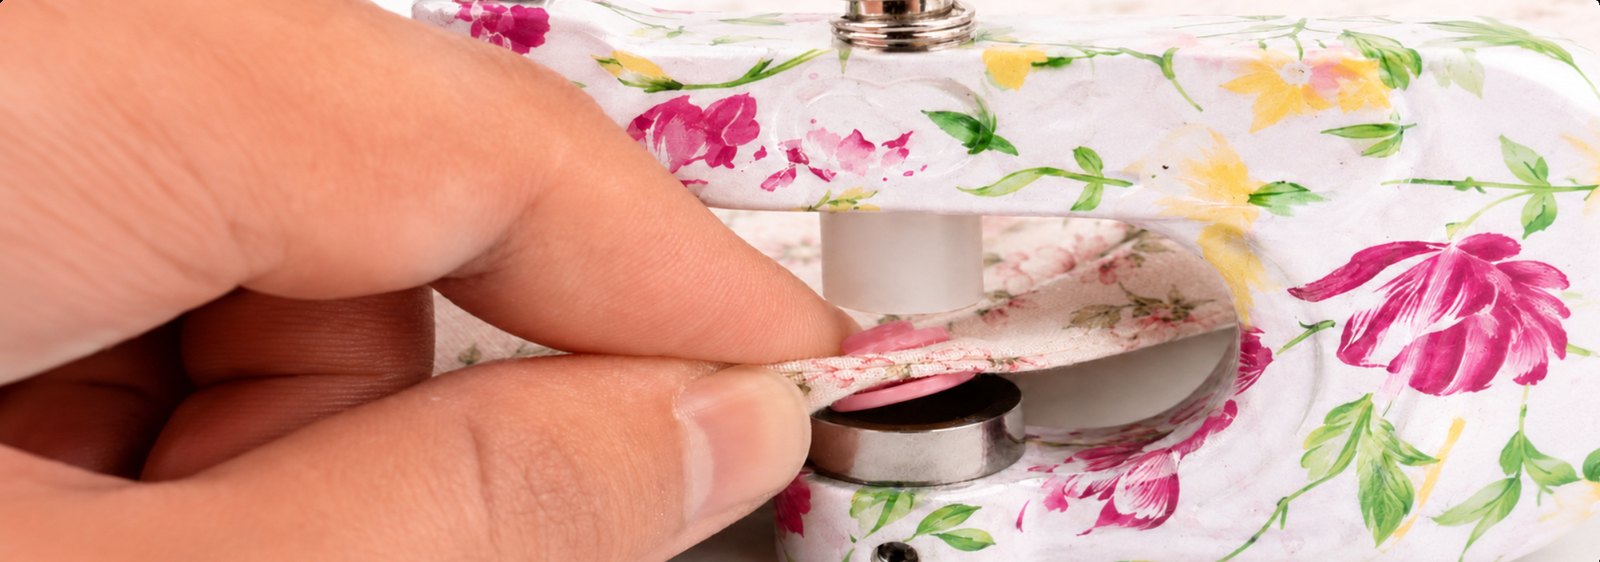
Centrez dans la pince.
Centre in the pliers.
Autres langues
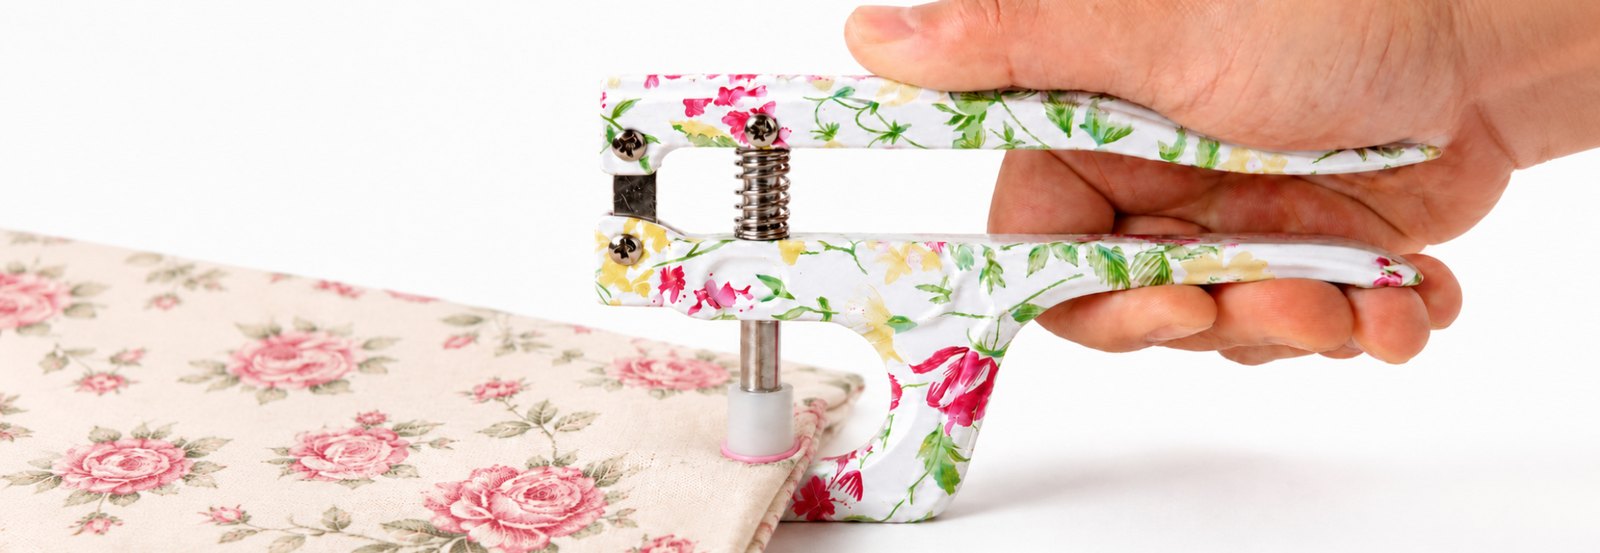
Pressez pour sertir.
Press to set.
Autres langues
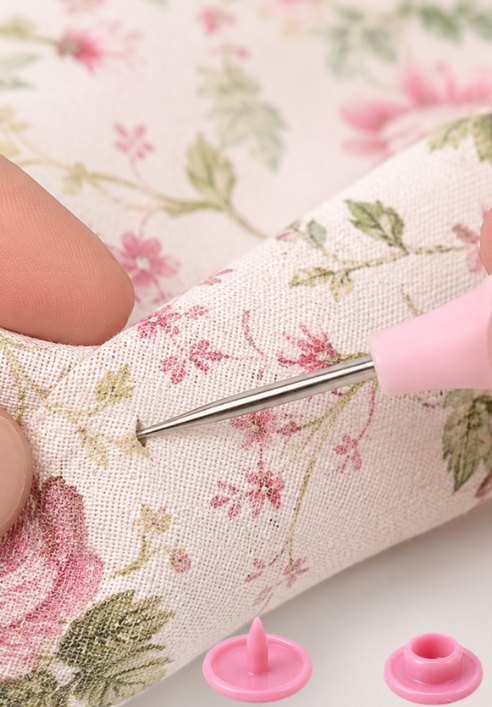
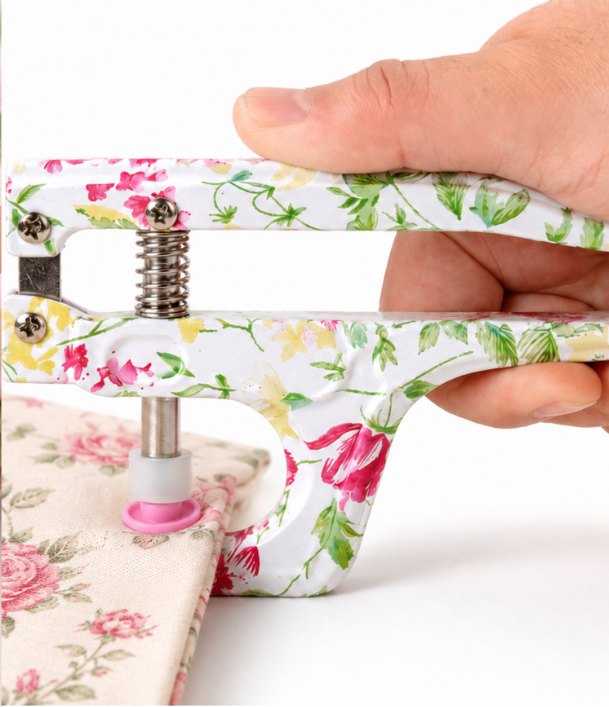
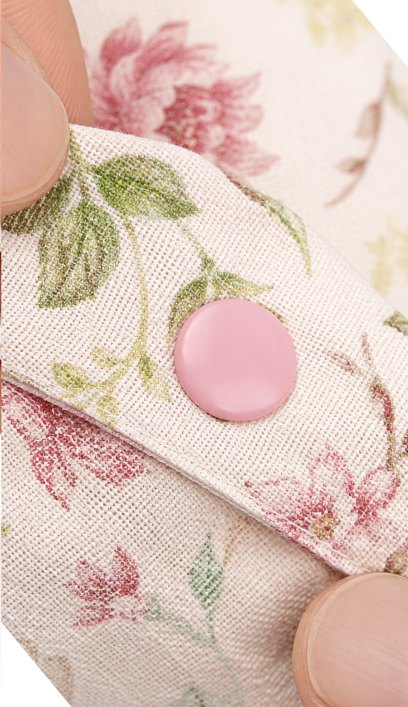
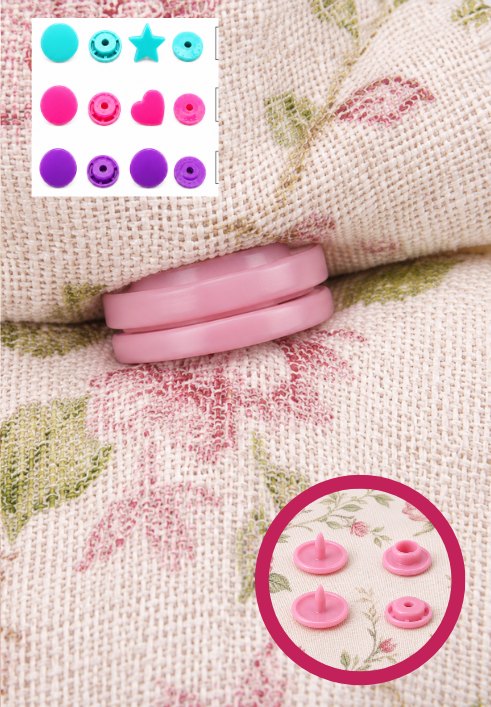
Répétez avec la partie mâle et testez.
Repeat with the male part and test.
Autres langues
Le bouton doit s’ouvrir et se fermer sans tourner ni se détacher.
The snap should open and close without turning or coming loose.
Faites toujours un essai sur une chute de tissu. Sur les tissus fins ou extensibles, ajoutez un petit renfort thermocollant.
Always test on a scrap of fabric. On thin or stretchy fabrics, add a small iron-on reinforcement.
Boutons-pression métalliques
Metal snap fasteners · Étapes 1 à 6 / Steps 1–6 · Matrices m + P5
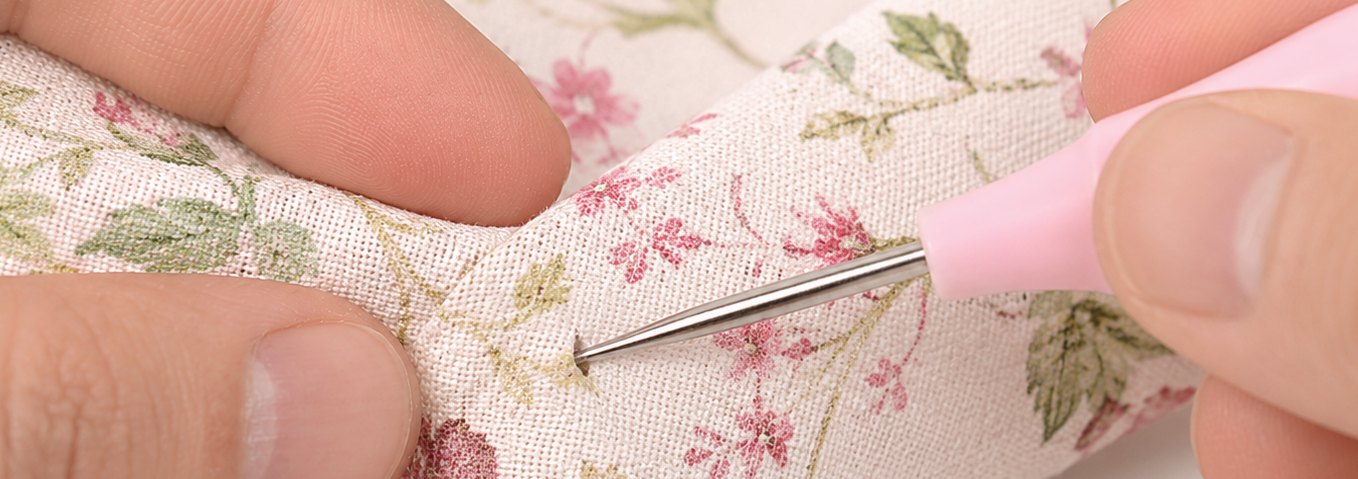
Marquez l’emplacement.
Mark the position.
Autres langues
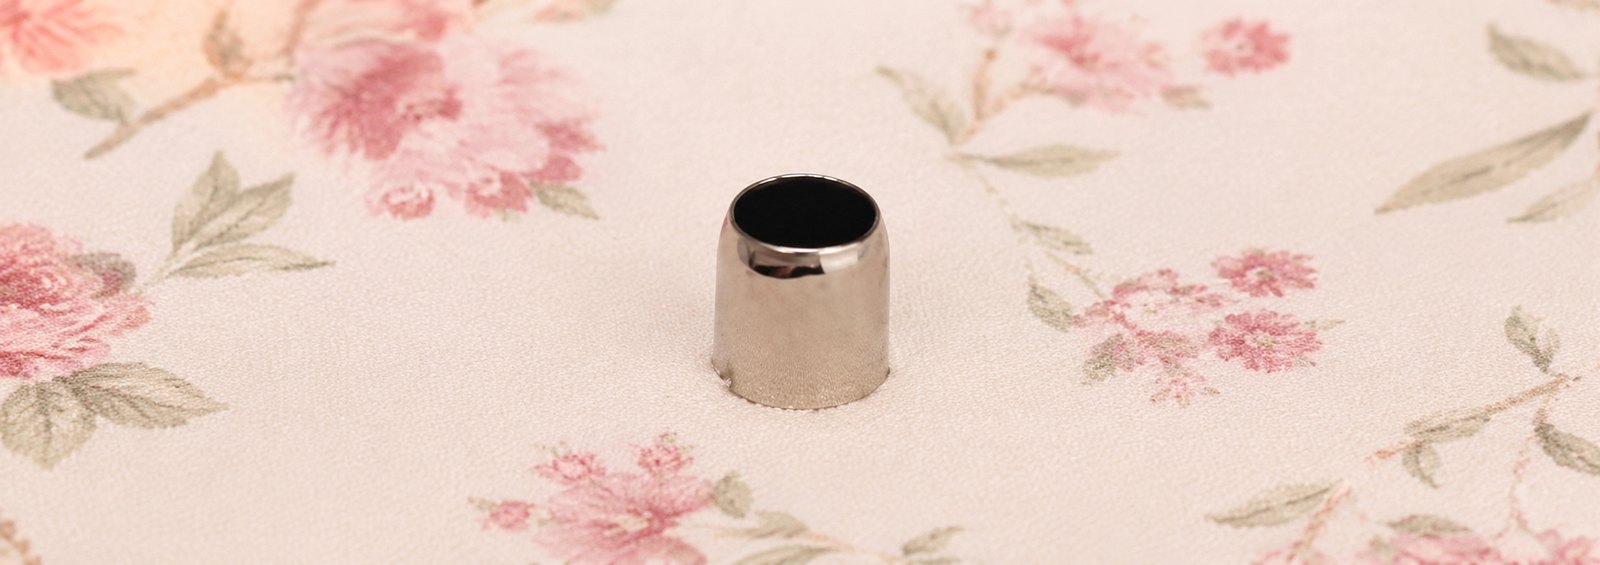
Insérez le capuchon ou la pièce à tige.
Insert the cap or pin part.
Autres langues
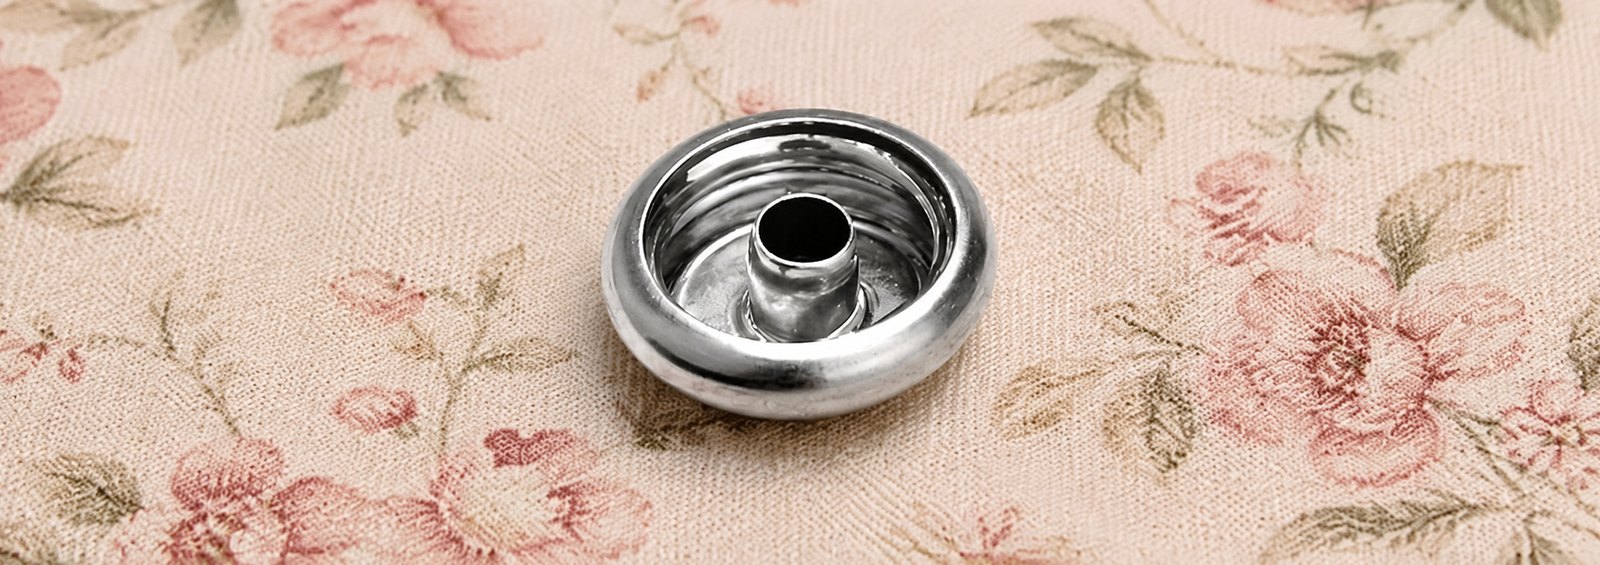
Placez la pièce complémentaire.
Place the matching part.
Autres langues
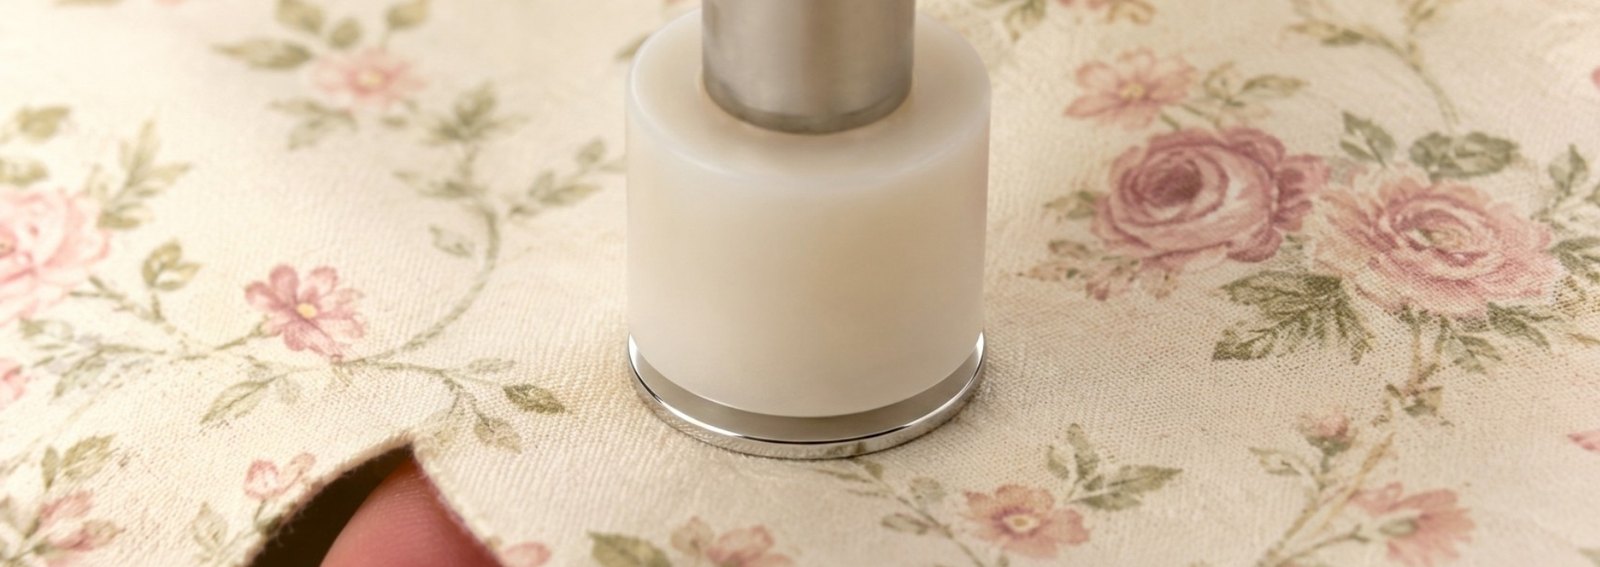
Centrez dans la pince.
Centre in the pliers.
Autres langues
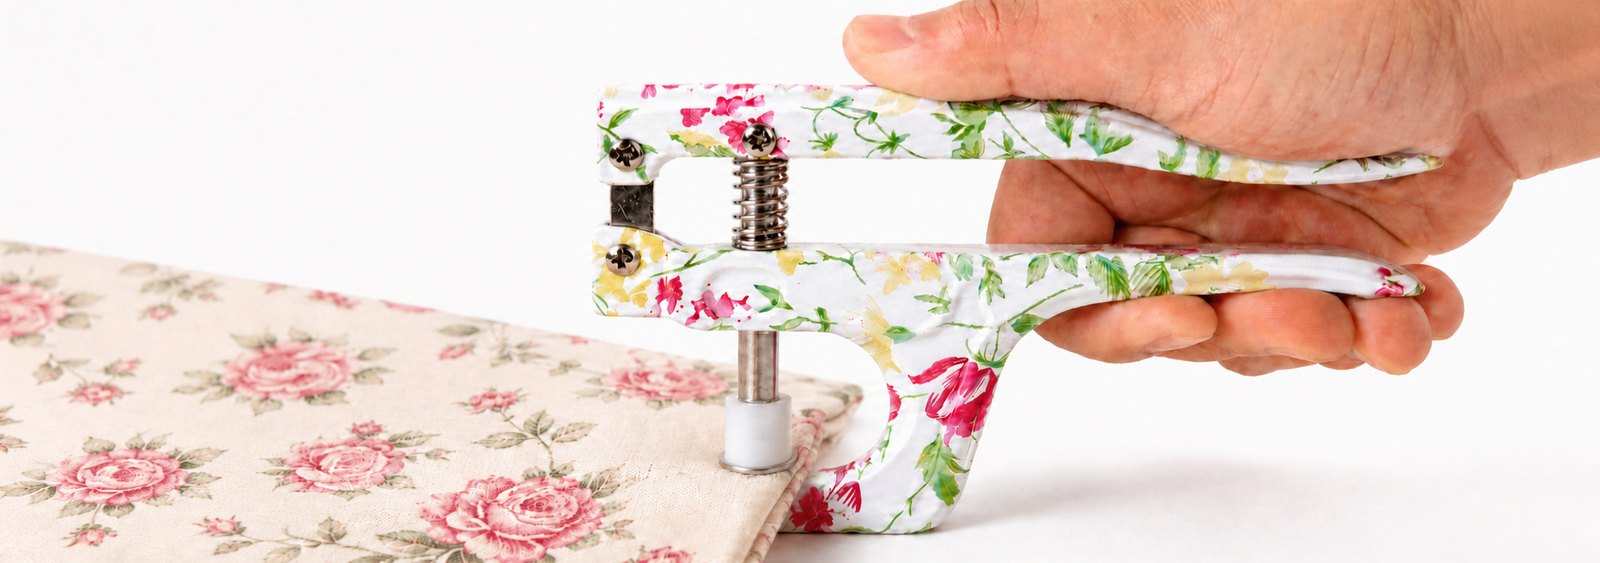
Pressez pour sertir.
Press to set.
Autres langues
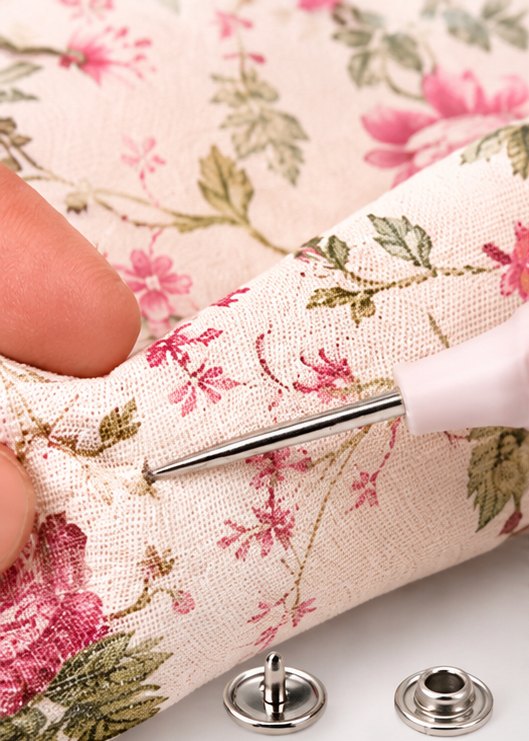
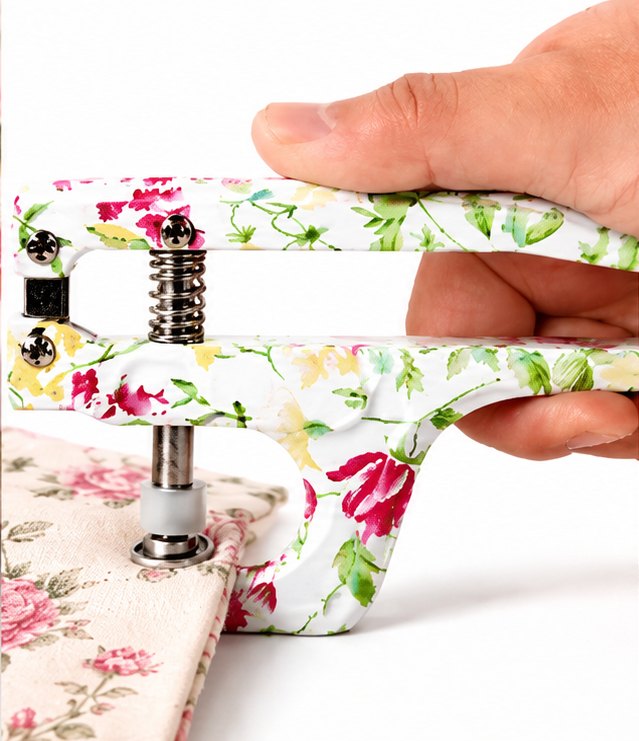
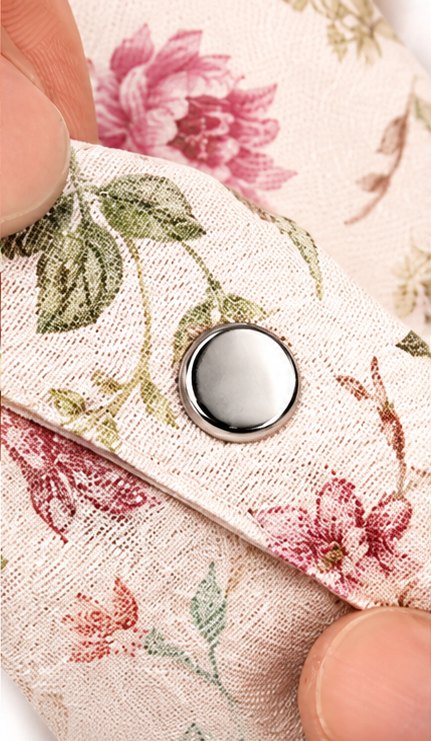
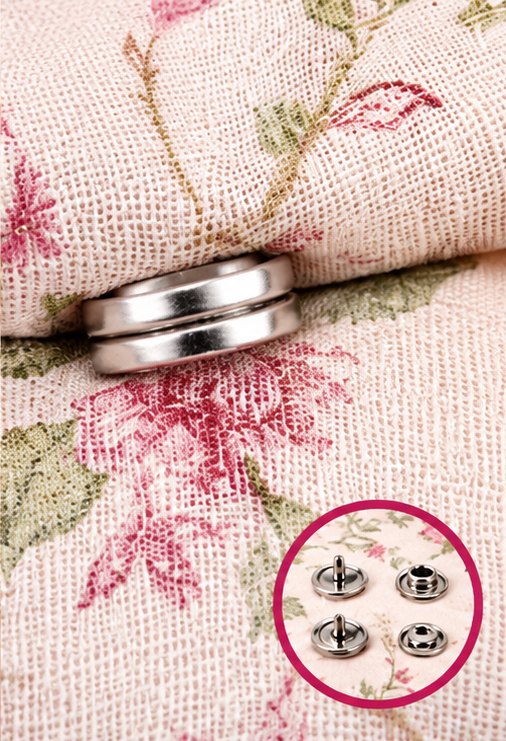
Répétez avec l’autre moitié et testez.
Repeat with the other half and test.
Autres langues
Vérifiez l’alignement avant de presser.
Check the alignment before pressing.
Faites toujours un essai sur une chute de tissu. Sur les tissus fins ou extensibles, ajoutez un petit renfort thermocollant.
Always test on a scrap of fabric. On thin or stretchy fabrics, add a small iron-on reinforcement.
Œillets métalliques
Metal eyelets · Étapes 1 à 3 / Steps 1–3 · Coupe H + h, pose E + e
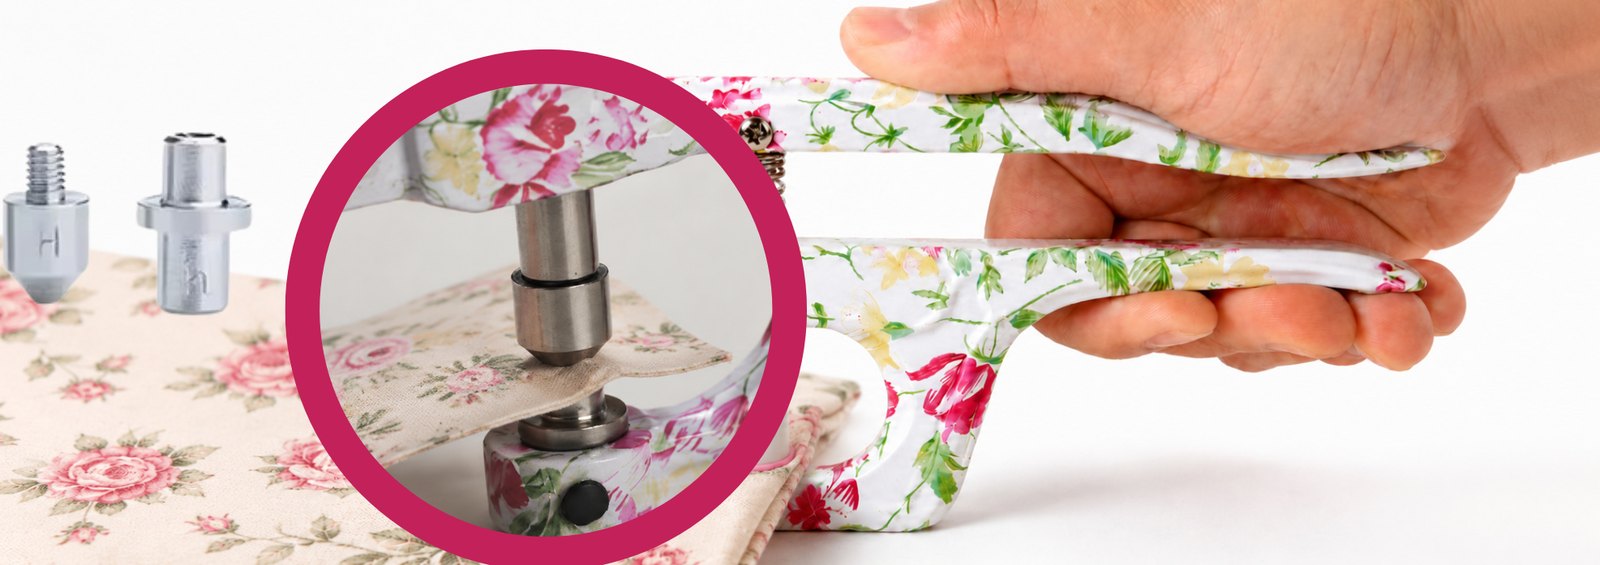
Marquez et percez.
Mark and pierce.
Autres langues
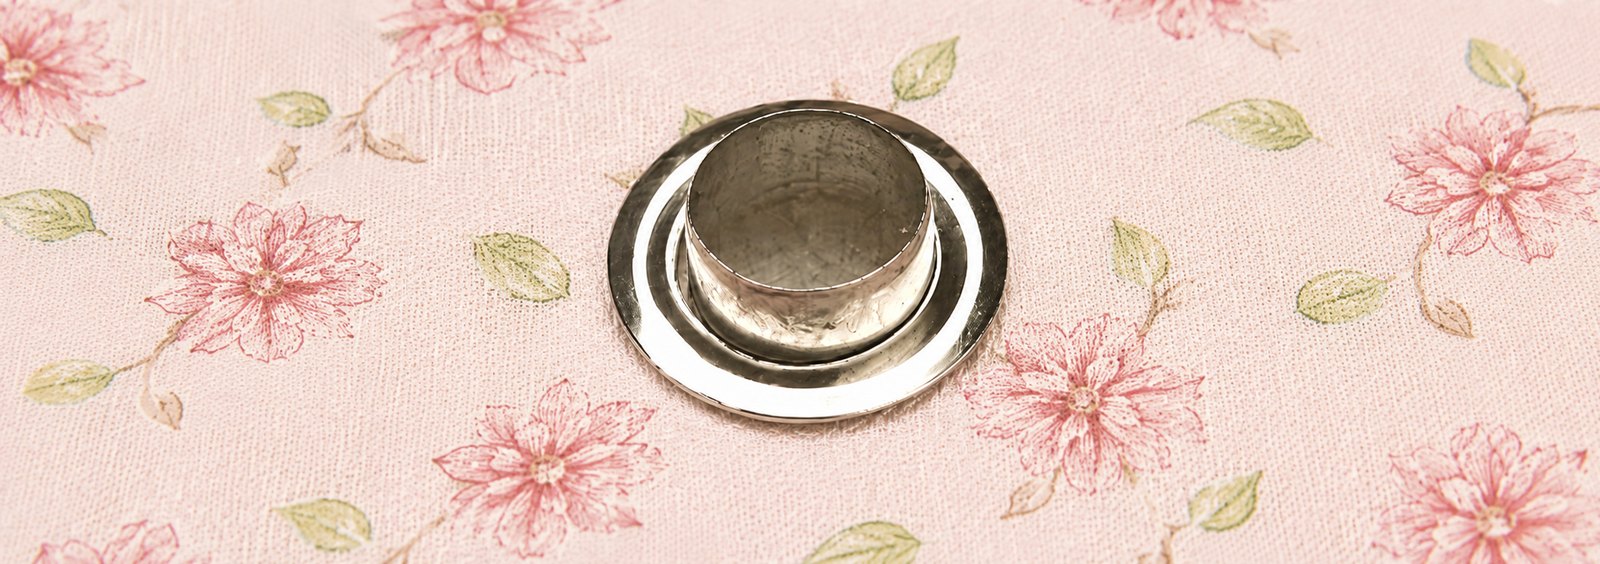
Insérez l’œillet et placez la rondelle.
Insert the eyelet and add the washer.
Autres langues
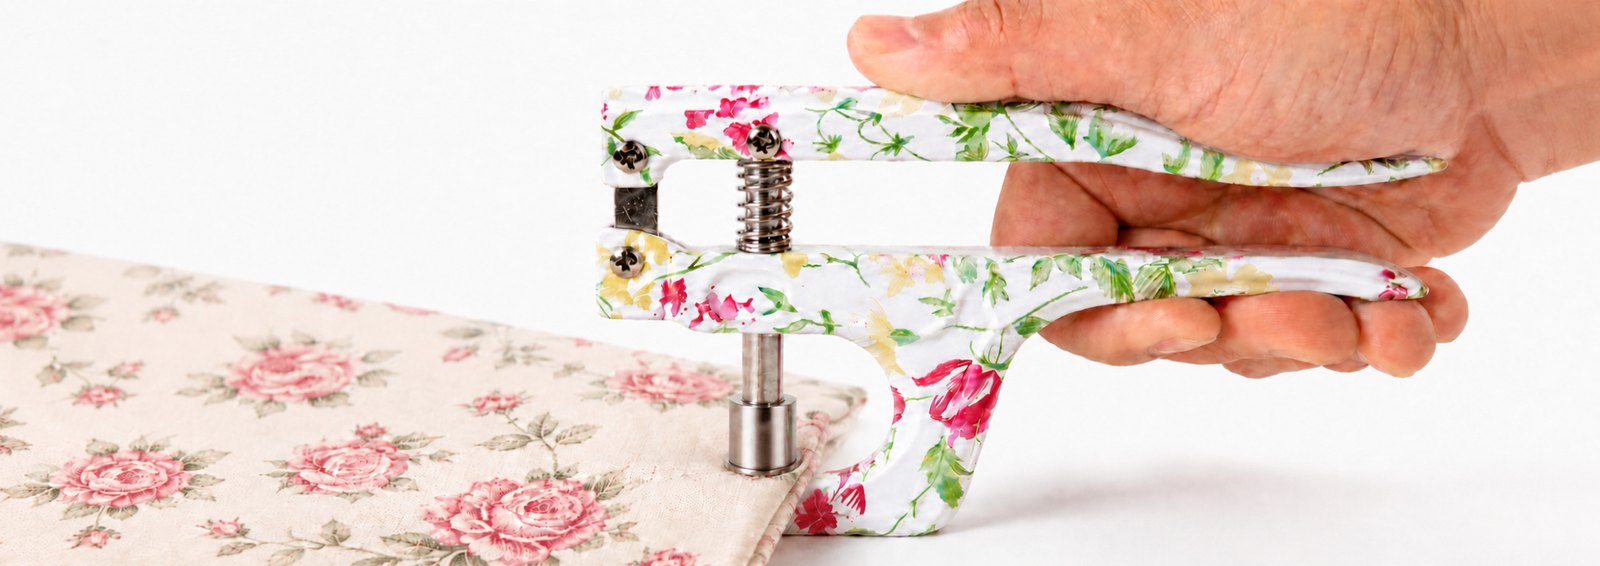
Centrez, pressez et vérifiez.
Centre, press and check.
Autres langues
Œillet plat · Œillet stable · Aucun bord coupant · Bonne matrice utilisée.
Flat eyelet · Stable eyelet · No sharp edge · Correct die used.
Conseils tissus
Fabric recommendations · 8 langues
- Pour les tissus fins ou transparents, utilisez une doublure légère.
- Pour les tissus rigides, humidifiez complètement l’échantillon avant l’application.
- Les tissus épais ne sont pas recommandés pour les petites tailles de boutons.
- Pour les jerseys, double jerseys et tissus très épais, découpez le tissu 1 à 2 mm plus petit que le gabarit.
- Pour les matières épaisses ou rigides, humidifiez le tissu entièrement avant usage (⚠️ ne pas humidifier le velours ni le cuir).
- L’épaisseur idéale correspond aux cotons 40s (popeline, toile fine…).
- Pour les tissus ajourés ou très fins, utilisez impérativement une doublure mince.
Seuls 2 types de boutons à recouvrir sont compatibles avec cet outil : boutons à dos plat (style A) et boutons à griffes (style B).
Only flat back (style A) and prong back (style B) cover buttons are compatible with this tool.
EN English — fabric recommendations and tips
- For sheer fabrics, use a thin lining to prevent transparency or tearing.
- For stiff fabrics, wet the swatch completely before application to ease shaping.
- Heavy fabrics are not recommended for smaller button sizes (risk of poor closure).
- For knits, double knits and thick fabrics, trim the swatch 1/16″ to 1/8″ smaller than the cutting template.
- For heavy or stiff fabrics, wet the fabric thoroughly before use (⚠️ do not wet velvet or leather).
- The most suitable fabric thickness is 40s (fine-to-medium cottons, poplin, thin canvas…).
- For sheer or open-weave fabrics, always use a thin inner lining.
- Only flat back (style A) and prong back (style B) cover buttons are compatible with this tool.
DE Deutsch — Stoffempfehlungen
- Für durchsichtige Stoffe eine dünne Einlage verwenden.
- Steife Stoffe sollten vor der Anwendung gründlich angefeuchtet werden.
- Schwere Stoffe sind für kleinere Knopfgrößen nicht geeignet.
- Bei Jersey, Doppeljersey oder sehr dicken Stoffen den Stoffzuschnitt 1–2 mm kleiner als die Vorlage machen.
- Schwere oder steife Stoffe gründlich anfeuchten (nicht bei Samt oder Leder!).
- Die ideale Stoffdicke liegt bei 40s Baumwolle (feine Popeline, leichter Canvas…).
- Für durchlässige oder dünne Stoffe eine dünne Futterlage verwenden.
- Nur Flachrückseitenknöpfe (Typ A) und Krallenknöpfe (Typ B) sind kompatibel.
IT Italiano — raccomandazioni per i tessuti
- Per i tessuti leggeri o trasparenti, utilizzare una fodera sottile.
- Per i tessuti rigidi, inumidire completamente il campione prima dell’uso.
- I tessuti pesanti non sono consigliati per i bottoni di piccole dimensioni.
- Per jersey, doppio jersey o tessuti spessi, ritagliare il tessuto 1–2 mm più piccolo del modello.
- Inumidire completamente i tessuti pesanti o rigidi (⚠️ escludere velluto e pelle).
- Lo spessore più adatto è il 40s (cotone fine, popeline…).
- Per i tessuti traforati o leggeri, usare una fodera sottile.
- Solo bottoni a dorso piatto (stile A) e con ganci (stile B) sono compatibili.
ES Español — recomendaciones para el tejido
- Para tejidos finos o transparentes, usar un forro delgado.
- Para tejidos rígidos, humedecer completamente la tela antes de usar.
- No se recomienda usar telas gruesas con botones pequeños.
- En tejidos de punto, punto doble o muy gruesos, recortar el tejido 1–2 mm más pequeño que la plantilla.
- Humedecer bien los tejidos gruesos o duros (excepto terciopelo o cuero).
- El grosor más adecuado es 40s (algodón fino, popelina…).
- Para tejidos abiertos o muy finos, usar siempre un forro delgado.
- Solo botones de base plana (estilo A) y con púas (estilo B) son compatibles.
NL Nederlands — aanbevelingen voor stoffen
- Gebruik bij doorzichtige stoffen een dunne voering.
- Bevochtig stijve stoffen grondig voor gebruik.
- Zware stoffen zijn niet geschikt voor kleine knoopmaten.
- Knip bij tricot, dubbeltricot of dikke stoffen de stof 1–2 mm kleiner dan het patroon.
- Bevochtig zware of stijve stoffen volledig (⚠️ geen fluweel of leer!).
- De meest geschikte stofdikte is 40s (fijne katoen, popeline…).
- Voor open of dunne weefsels altijd een dunne voering gebruiken.
- Alleen knopen met platte achterkant (stijl A) en klauwbevestiging (stijl B) zijn geschikt.
PL Polski — zalecenia dotyczące tkanin
- Dla cienkich lub przezroczystych tkanin użyj cienkiej podszewki.
- Sztywne tkaniny należy dokładnie zwilżyć przed użyciem.
- Grube tkaniny nie nadają się do małych guzików.
- Dla dzianin i grubych tkanin przytnij próbkę o 1–2 mm mniejszą niż szablon.
- Grube lub sztywne materiały dokładnie zwilż (⚠️ nie dotyczy aksamitu i skóry).
- Najlepsza grubość tkaniny to 40s (cieńsze bawełny, popeliny…).
- Przy tkaninach siatkowych użyj zawsze cienkiej podszewki.
- Pasują tylko guziki z płaskim tyłem (typ A) i z ząbkami (typ B).
SV Svenska — rekommendationer för tyger
- För tunna eller genomskinliga tyger, använd ett tunt foder.
- För stela tyger, blöt tyget helt innan användning.
- Tjocka tyger rekommenderas inte för mindre knappar.
- För stickade eller tjocka tyger, klipp 1–2 mm mindre än mallen.
- Blöt ordentligt vid styva eller tjocka tyger (⚠️ inte sammet eller läder).
- Den mest lämpliga tygkvaliteten är 40s (tunn bomull, poplin…).
- Vid genombrutna eller tunna tyger, använd alltid tunt foder.
- Endast täckknappar med platt baksida (stil A) och med piggar (stil B) är kompatibla.
CS Čeština — doporučení pro látky
- U tenkých nebo průhledných látek použijte tenkou podšívku.
- Tuhé látky důkladně navlhčete před použitím.
- Silné látky nejsou vhodné pro malé velikosti knoflíků.
- U pletenin nebo velmi silných látek ořízněte vzorek o 1–2 mm menší než šablona.
- Těžké nebo tuhé látky navlhčete (⚠️ neplatí pro samet a kůži).
- Nejvhodnější tloušťka látky je 40s (tenké bavlny, popelín…).
- U průsvitných tkanin vždy použijte tenkou podšívku.
- Kompatibilní jsou pouze knoflíky s plochou zadní stranou (typ A) a s hroty (typ B).
Avertissements
Warnings and product information
- Tenir hors de portée des enfants. Ce produit n’est pas un jouet.
- Contient de petites pièces. Ne convient pas aux enfants de moins de 3 ans.
- Les outils comportent des pointes et des bords pouvant être coupants. Manipuler avec précaution.
- Porter des lunettes de protection lors de la pose d’œillets métalliques.
- Vérifier que les matrices sont correctement serrées avant utilisation.
- Utiliser uniquement conformément à cette notice.
- Faites toujours un essai sur une chute de tissu avant chaque projet.
EN Warning
- Keep out of reach of children. This product is not a toy.
- Contains small parts. Not suitable for children under 3 years.
- Tools have sharp points and edges. Handle with care.
- Wear safety glasses when installing metal eyelets.
- Ensure the dies are securely tightened before use.
- Use only as described in this manual.
- Always test on a scrap of fabric before use.
DE Warnung
- Außer Reichweite von Kindern aufbewahren. Dieses Produkt ist kein Spielzeug.
- Enthält Kleinteile. Nicht für Kinder unter 3 Jahren geeignet.
- Werkzeuge besitzen scharfe Spitzen und Kanten. Vorsichtig handhaben.
- Beim Anbringen von Metallösen Schutzbrille tragen.
- Vor Gebrauch prüfen, dass die Matrizen fest angezogen sind.
- Nur gemäß dieser Anleitung verwenden.
- Vor der Anwendung immer an einem Stoffrest testen.
IT Avvertenza
- Tenere fuori dalla portata dei bambini. Questo prodotto non è un giocattolo.
- Contiene piccole parti. Non adatto ai bambini di età inferiore a 3 anni.
- Gli utensili presentano punte e bordi affilati. Maneggiare con cautela.
- Indossare occhiali protettivi durante l’installazione degli occhielli metallici.
- Verificare che le matrici siano ben serrate prima dell’uso.
- Utilizzare esclusivamente secondo queste istruzioni.
- Effettuare sempre una prova su un ritaglio di tessuto prima dell’uso.
NL Waarschuwing
- Buiten het bereik van kinderen houden. Dit product is geen speelgoed.
- Bevat kleine onderdelen. Niet geschikt voor kinderen jonger dan 3 jaar.
- Gereedschap heeft scherpe punten en randen. Voorzichtig gebruiken.
- Draag een veiligheidsbril bij het plaatsen van metalen oogjes.
- Controleer vóór gebruik of de matrijzen goed zijn vastgedraaid.
- Alleen volgens deze handleiding gebruiken.
- Test altijd eerst op een stukje reststof voordat u begint.
ES Advertencia
- Mantener fuera del alcance de los niños. Este producto no es un juguete.
- Contiene piezas pequeñas. No apto para niños menores de 3 años.
- Las herramientas tienen puntas y bordes afilados. Manipular con cuidado.
- Utilice gafas de protección al colocar ojales metálicos.
- Compruebe que las matrices estén bien apretadas antes de usar.
- Utilice el producto únicamente según estas instrucciones.
- Realice siempre una prueba en un retal de tela antes de usar.
PT Aviso
- Manter fora do alcance das crianças. Este produto não é um brinquedo.
- Contém peças pequenas. Não adequado para crianças com menos de 3 anos.
- As ferramentas possuem pontas e arestas afiadas. Manuseie com cuidado.
- Use óculos de proteção ao instalar ilhós metálicos.
- Verifique se as matrizes estão bem apertadas antes da utilização.
- Utilize apenas de acordo com este manual.
- Faça sempre um teste num retalho de tecido antes da utilização.
PL Ostrzeżenie
- Przechowywać poza zasięgiem dzieci. Produkt nie jest zabawką.
- Zawiera małe elementy. Nieodpowiednie dla dzieci poniżej 3 roku życia.
- Narzędzia mają ostre końcówki i krawędzie. Używać ostrożnie.
- Podczas montażu metalowych oczek należy nosić okulary ochronne.
- Przed użyciem upewnij się, że matryce są prawidłowo dokręcone.
- Używać wyłącznie zgodnie z niniejszą instrukcją.
- Przed użyciem zawsze wykonaj próbę na skrawku tkaniny.
Informations produit
Product information
CS-KBP-300-FL
Lot / Batch : 202607-01
SASU CLEM
16 Clos du Moulin
45450 Donnery — France
Fabriqué pour COUTURSUP® — SASU CLEM.
Tri et recyclage
Sorting and recycling · Séparez les éléments avant de trier
Merci pour votre achat. Pour contribuer à la protection de l’environnement, suivez les consignes de tri de votre pays.
FR France — loi AGEC
- 📦 Étui en carton : à recycler (bac jaune)
- 📄 Notice : à recycler (bac jaune)
- 🧴 Sachet plastique : à jeter (bac noir)
Logos Triman et info-tri présents sur l’emballage.
IT Italia — D.Lgs. 116/2020
- PAP21 — Raccolta Carta (scatola e istruzioni)
- LDPE04 — Raccolta Plastica (busta trasparente)
Smaltire correttamente secondo il sistema locale.
DE Deutschland
- Karton → Papiertonne
- Plastikbeutel → Restmüll oder Gelbe Tonne (je nach Region)
ES España — Ecoembes
- Caja de cartón → Contenedor azul
- Bolsa de plástico → Contenedor amarillo
NL Nederland
- Kartonnen doos → Papierbak
- Plastic zak → PMD-bak
BE België / Belgique
- Kartonnen doos → Papierafval
- Plastic zak → Restafval of PMD (afhankelijk van uw regio)
SE Sverige
- Kartong → Pappersinsamling
- Plastpåse → Plastförpackning
PL Polska
- Karton → Pojemnik na papier
- Folia plastikowa → Odpady zmieszane lub plastik
IE / UK Ireland — United Kingdom
- Cardboard box → Paper & card recycling
- Plastic wrap → Plastic packaging bin or general waste (check local council guidance)
Coutursup est adhérent à l’éco-organisme LEKO pour la filière des emballages ménagers. Numéro d’identification unique (IDU) : FR452488_01OXNP.
Coutursup is a registered member of the French eco-organisation LEKO for household packaging. Producer ID: FR452488_01OXNP.